
I’ll give you some tips on how to make Photoshop faster just by tweaking some options in Preferences.
Note: I am using Photoshop CS4 and the screenshots are from that version, but don’t worry if you have an older version of the software – they all have those options, only the text and positioning may vary. Look around and you will find them.
To bring up the Preferences dialog box go to Edit-> Preferences or click Ctrl-K: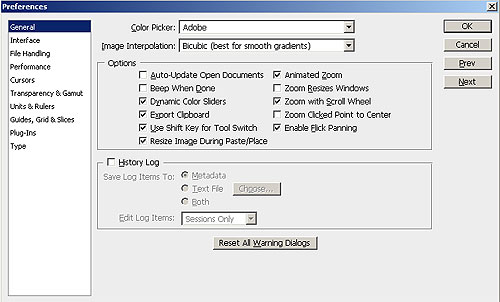
Tip 1: Adjust the Performance settings
Choose Performance:
As you can see, you have four sections here: Memory Usage, Scratch Disks, History & Cache and GPU Settings. We’ll play around with first three.
Memory Usage
Photoshop uses a lot of your system’s RAM and shares it with the operating system. The amount of RAM usage is adjustable in Photoshop — you can set the limit (maximum amount) that the application uses. Depending on how much RAM you have fitted on your computer, change it to 55-65% (for those of you with up to 2 GB of RAM) and 70-75% (for 4 GB RAM and more).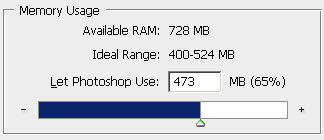
Note: don’t push the slider all the way to the maximum because your system may crash. Use it wisely, leave some for the operating system.
Scratch Disks
In addition to RAM, Photoshop uses Scratch Disks or so-called “virtual RAM”. A scratch disk is hard drive space that is allocated for the program to as virtual RAM use while processing data. If you have more than one hard drive, allowing Photoshop to use the secondary hard drive will dramatically increase its working speed.
Set as many as you want, don’t worry about the space – it is only temporary and will be wiped once you quit Photoshop.
History & Cache
We are not perfect, right? And we do lots of mistakes while working on a task (I do a lot). Just imagine how would it be if there were no “undo’s”? Fortunately, in Photoshop we can even set the amount of History States (undo’s) but the more you set – the more memory it takes. Because every action is “remembered” in virtual memory thus, it requires more space to keep those steps available for recalling.
By default, History States is set to 20, which, for the slower machines is just too much. Sad, but it really slows down Photoshop, especially when you are working with large images. Set it to 10-15 and it’ll run a lot smoother.
Cache levels are used to improve screen redraw and histogram rendering speed. Choose more Cache levels for larger documents with fewer layers, or fewer Cache levels for smaller documents with many layers. You can choose from 1 to 8 levels.
Note: all these changes will take effect after you restart Photoshop.
Tip 2: Purge your Clipboard
Here again – RAM issues. Photoshop’s clipboard uses a lot of RAM and if you have copied several large images and pasted it to a new document, it is still in your clipboard. Free up the RAM by purging unnecessary data from your clipboard. To do that, go to Edit->Purge: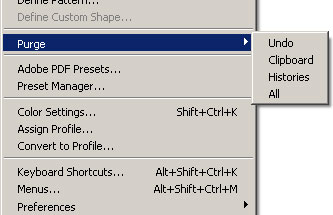
Note: this action is cannot be undone, so think twice if you don’t need the data in clipboard, history, or undo’s anymore.
Tip 3: Defragment your hard drives
Especially for smaller capacity hard drives, fragmentation is an issue. Use Windows Defragmenter to optimize your hard disks every once in a while. I do it once a month. Go to Start>All Programs>Accessories> System Tools>Disk Defragmenter. Choose the drive to be defragmented and then select the Defragment button.
Tip 4: Close unnecessary software
This tip is kind of obvious but sometimes we forget about it and then complain why Photoshop is running so slowly. This is due to applications that are running in the background, using up processing power and RAM. Quit everything except for the applications needed for the task.
These are tweaking tips I use to speed up my Photoshop and they really are useful. If you have more tips on that let the people know, leave them in comments.
under
knowledge database,
tips and trick,
tutorials.
![]()


0 Comments to “how to customized your photoshop to become faster in slower PC”
Post a Comment